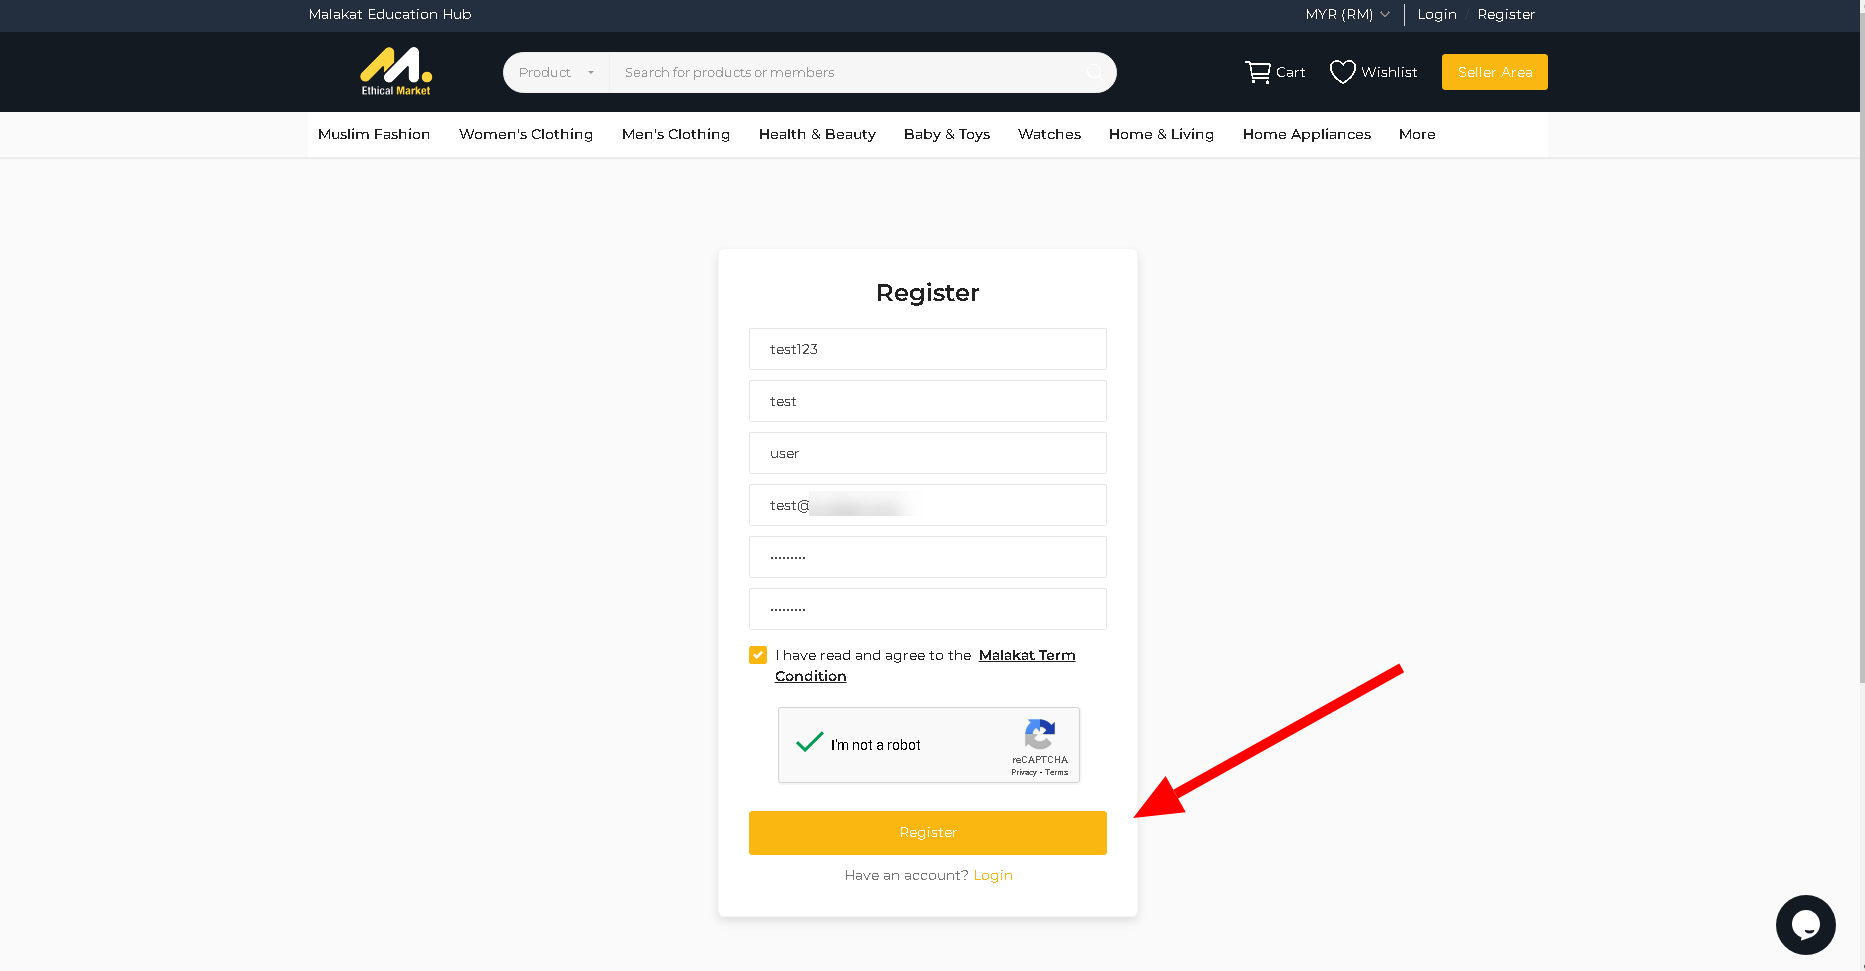
1. Browse to Malakat.com, click “Register“.
2. Fill up all the required fields and click “Register“.
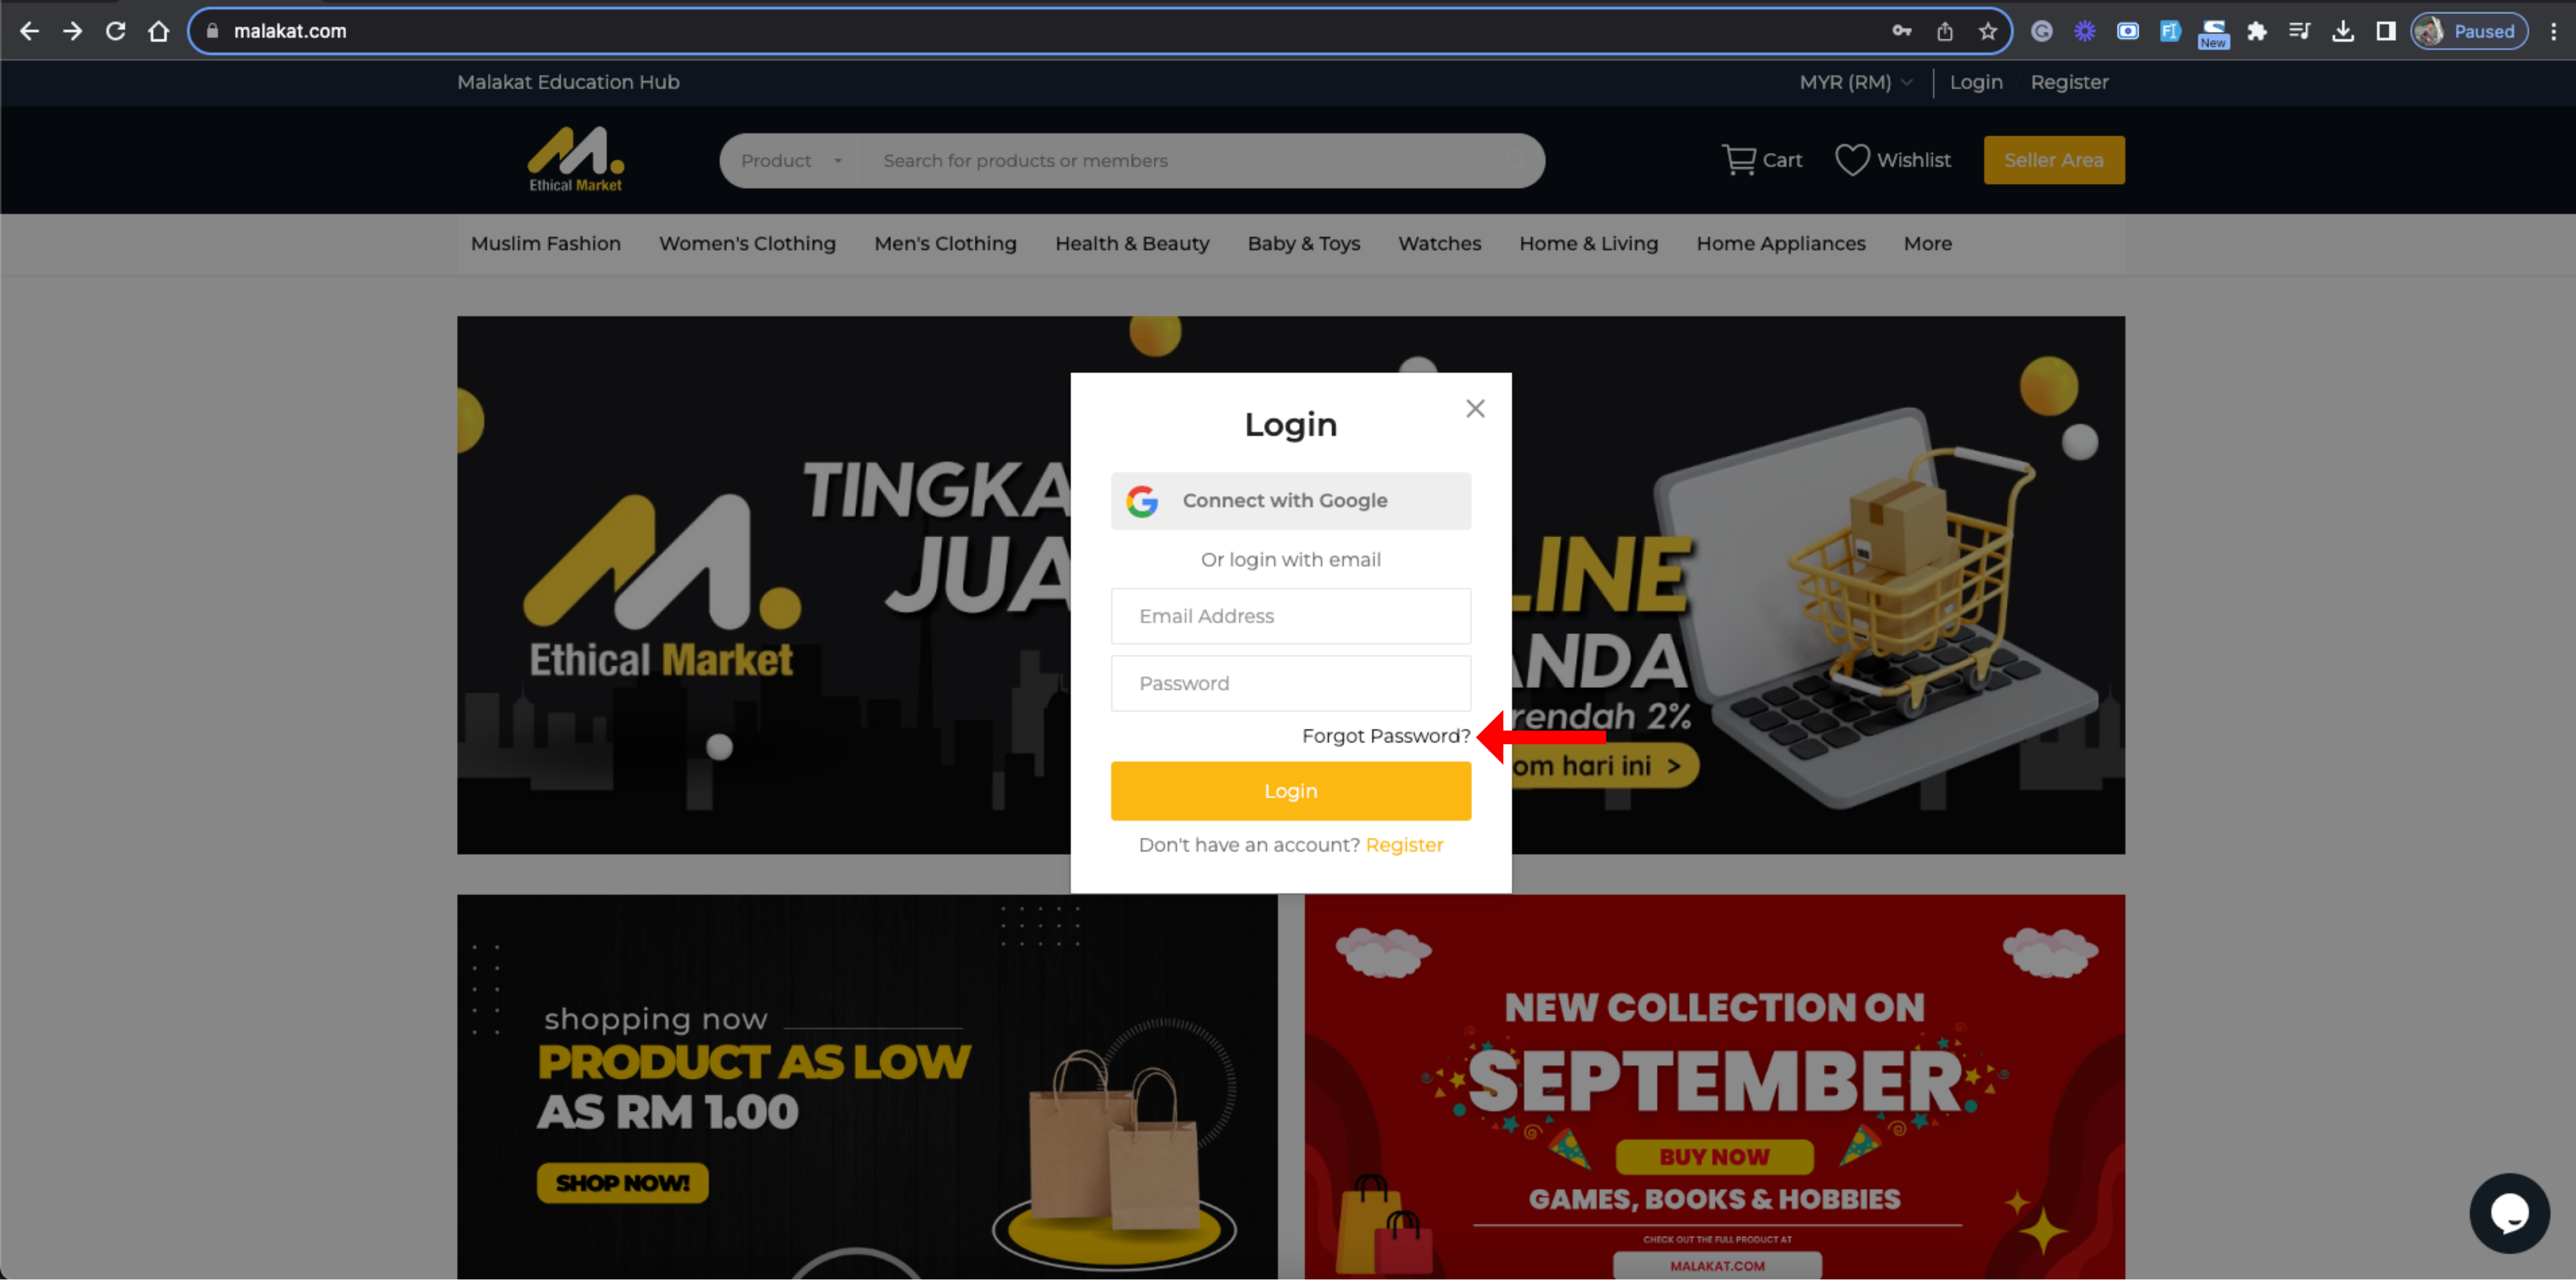
1. on the login form click “Forgot Password“.
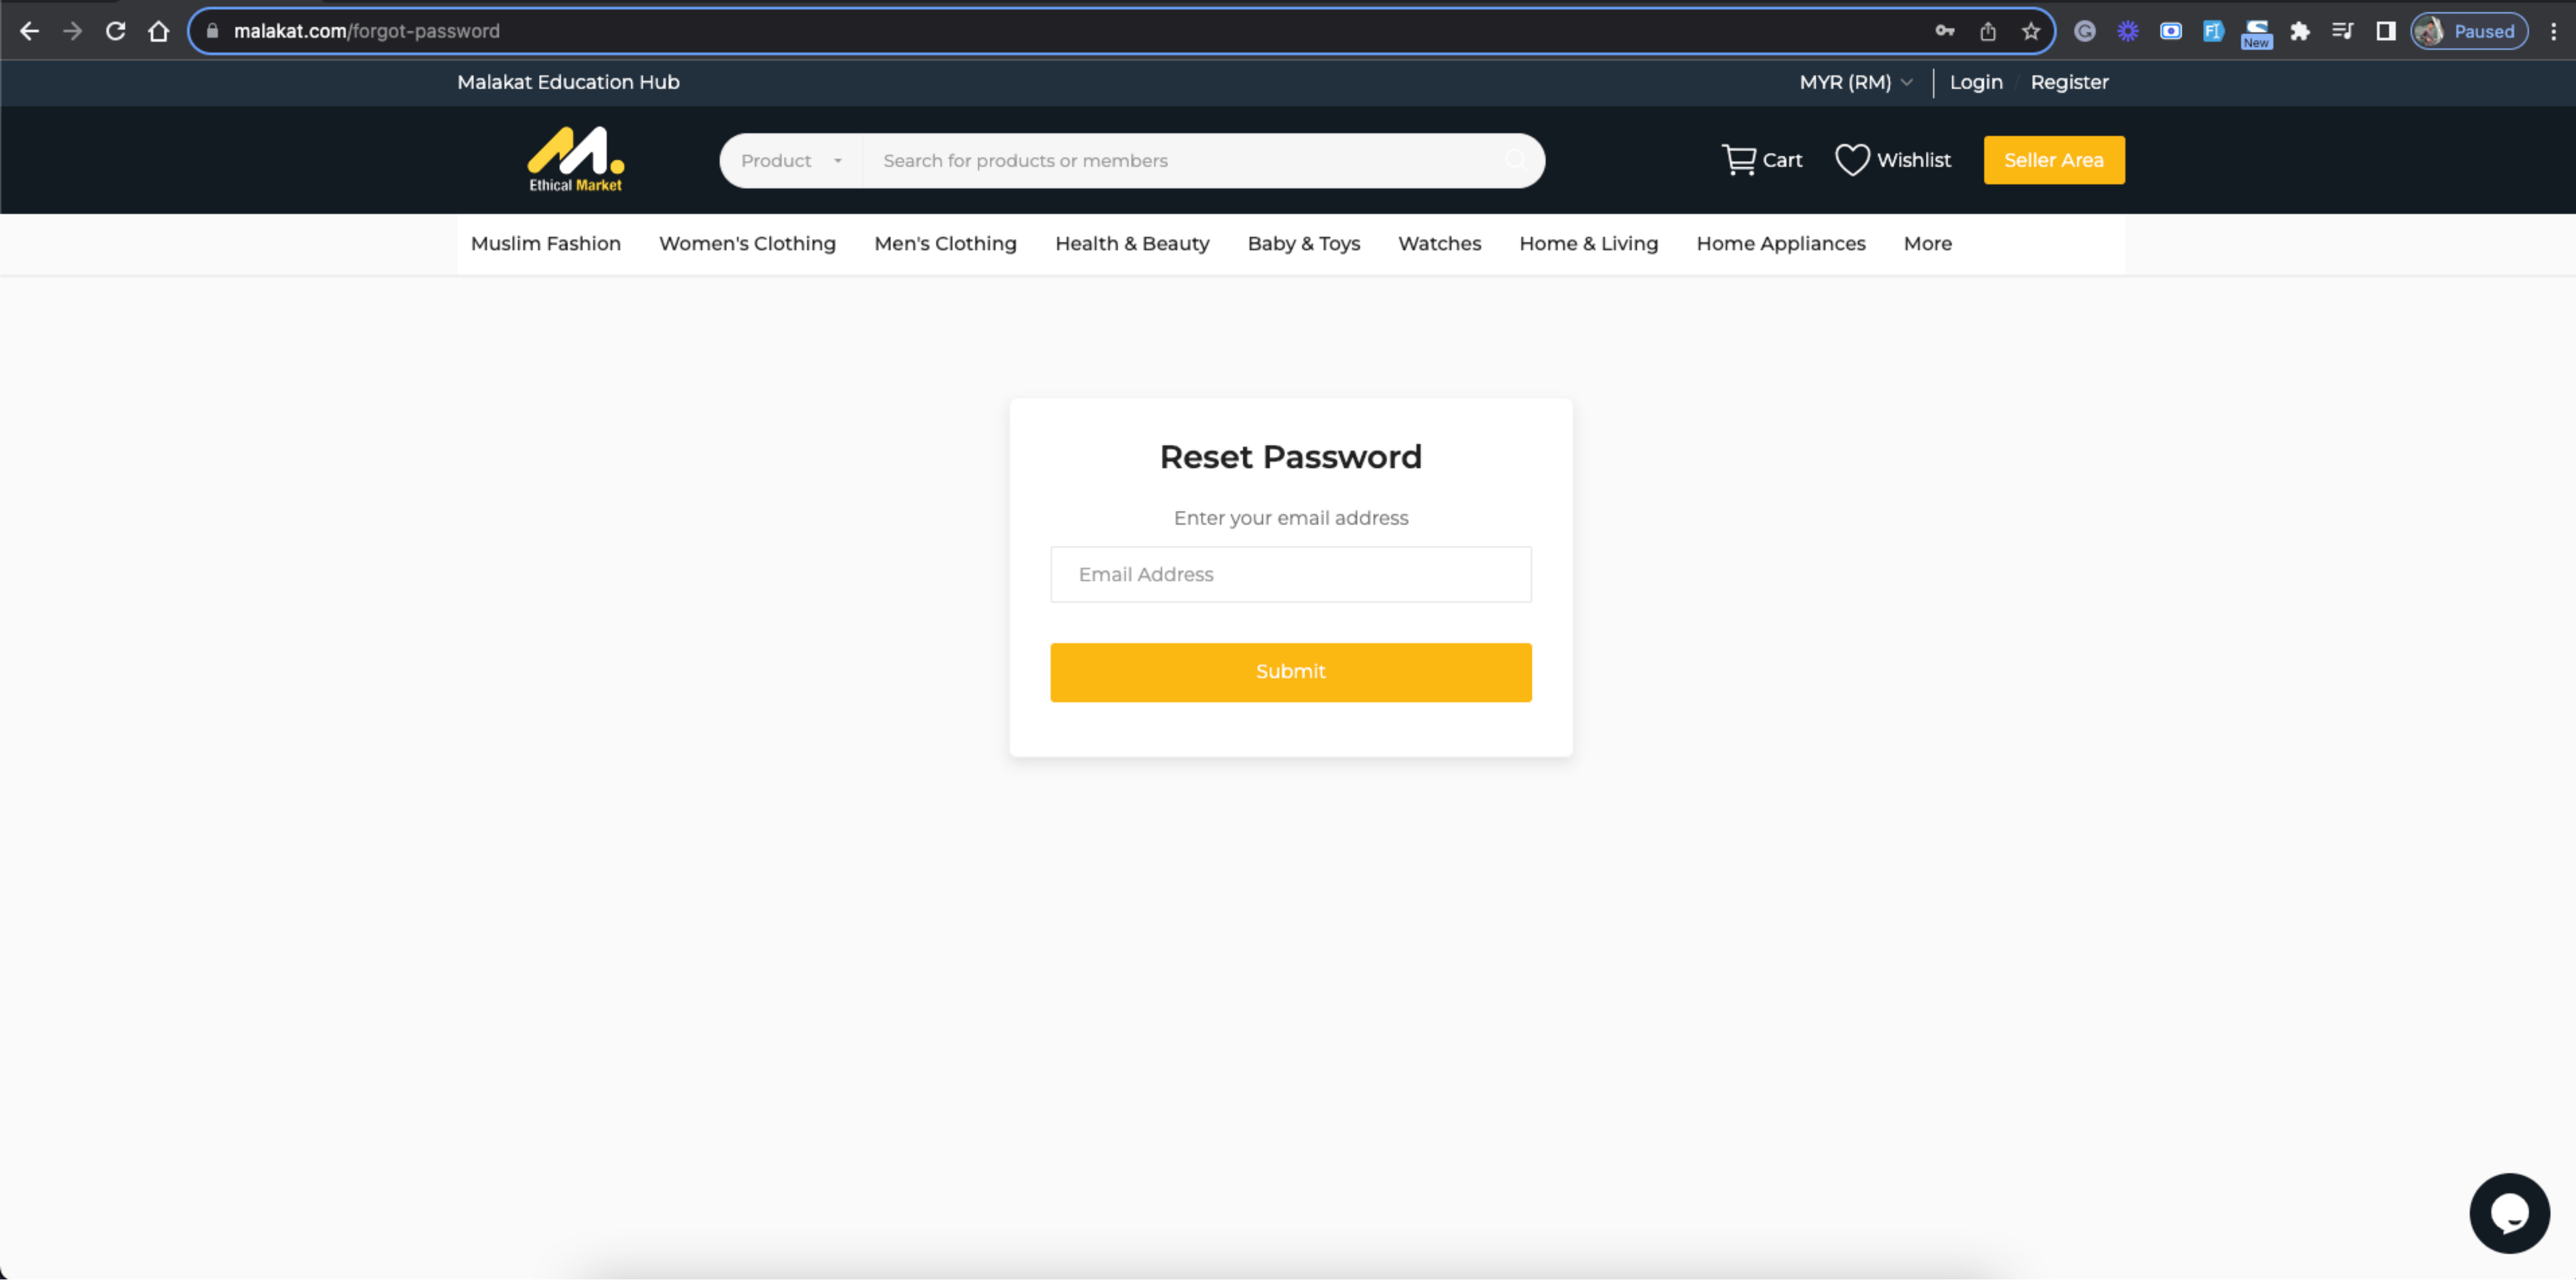
2. Next, enter your email address
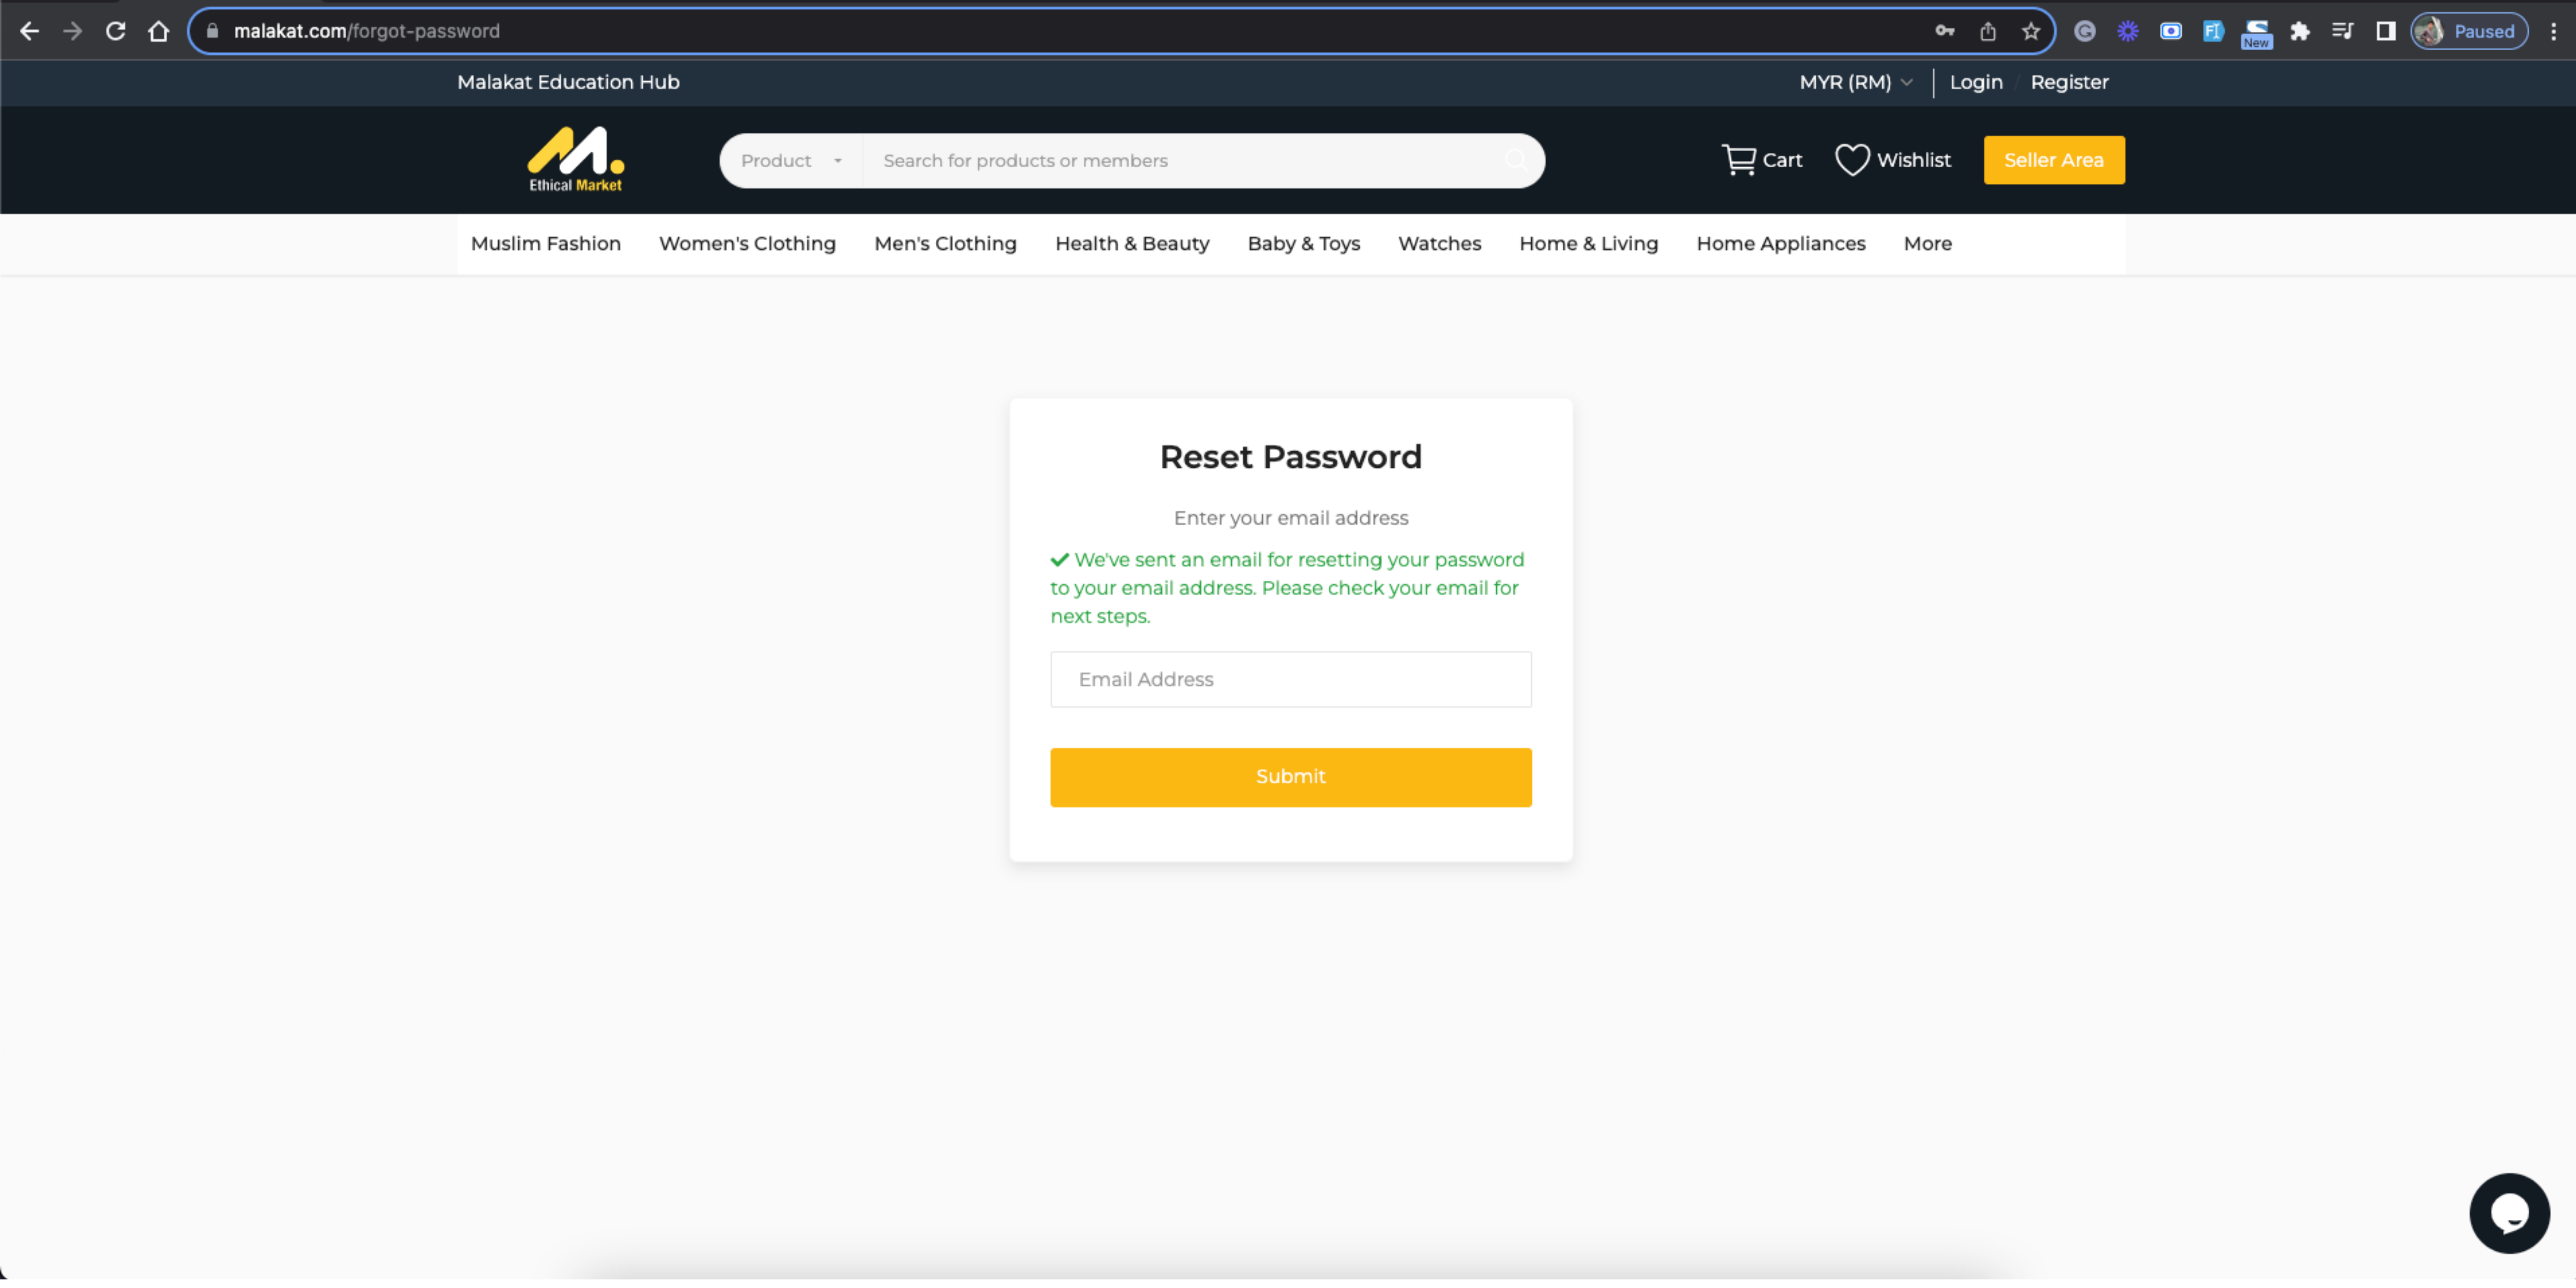
3. The system will send an email to reset your password to your email address. Click on the link and set your new password.
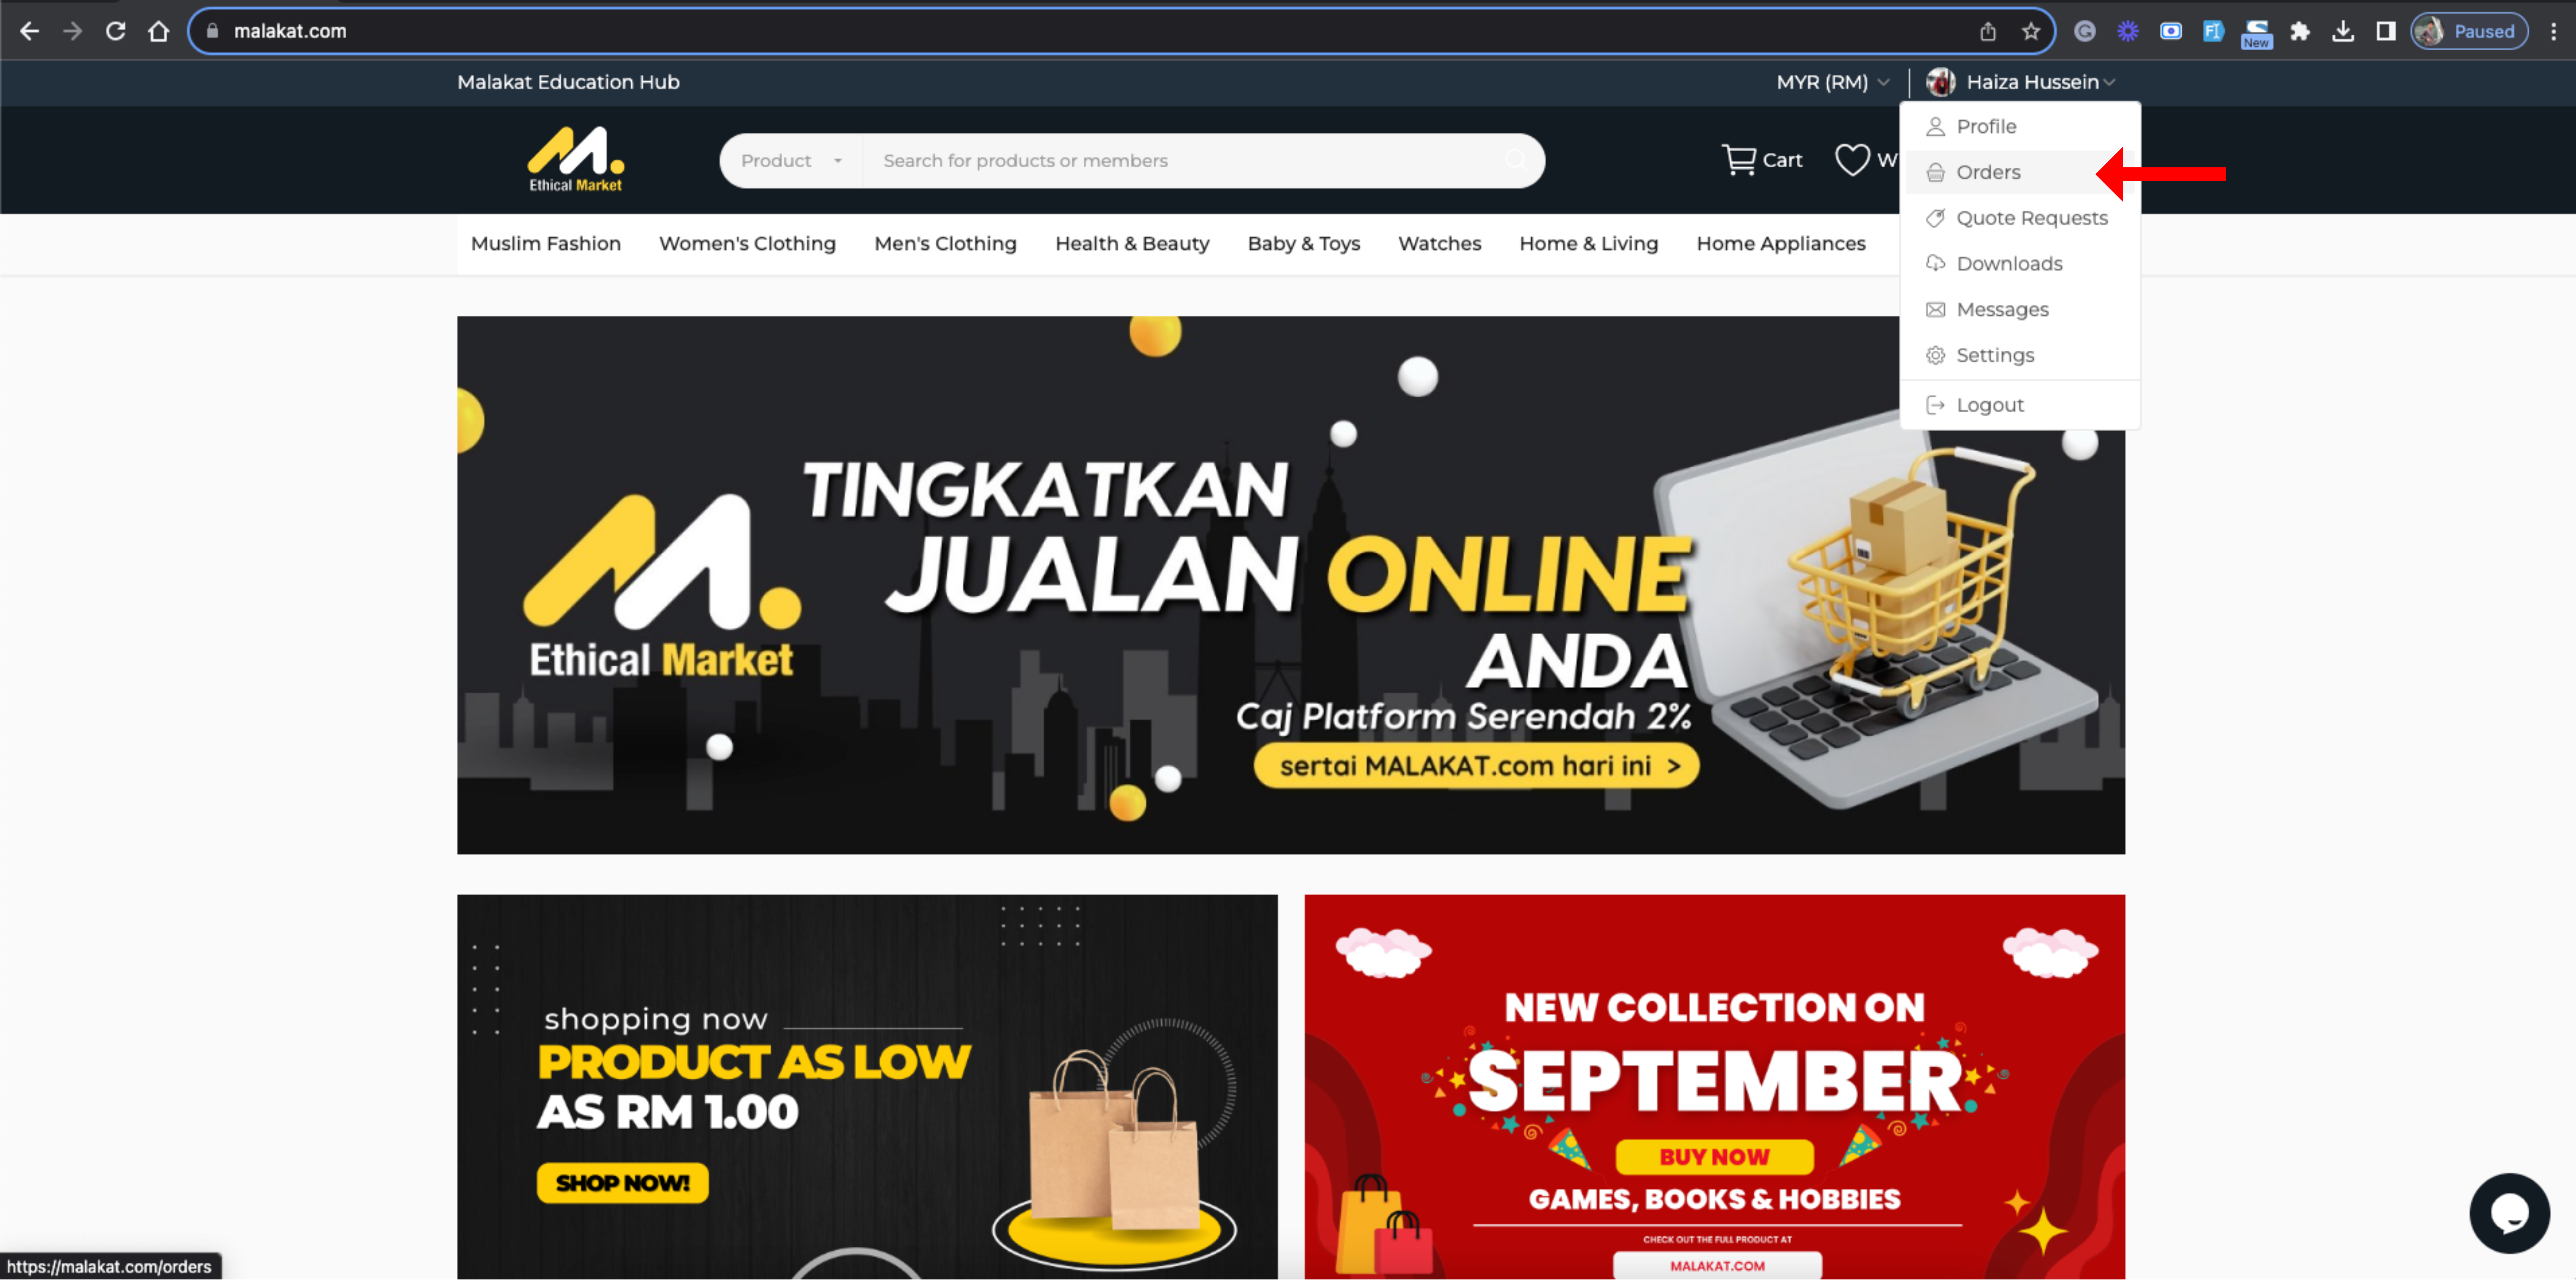
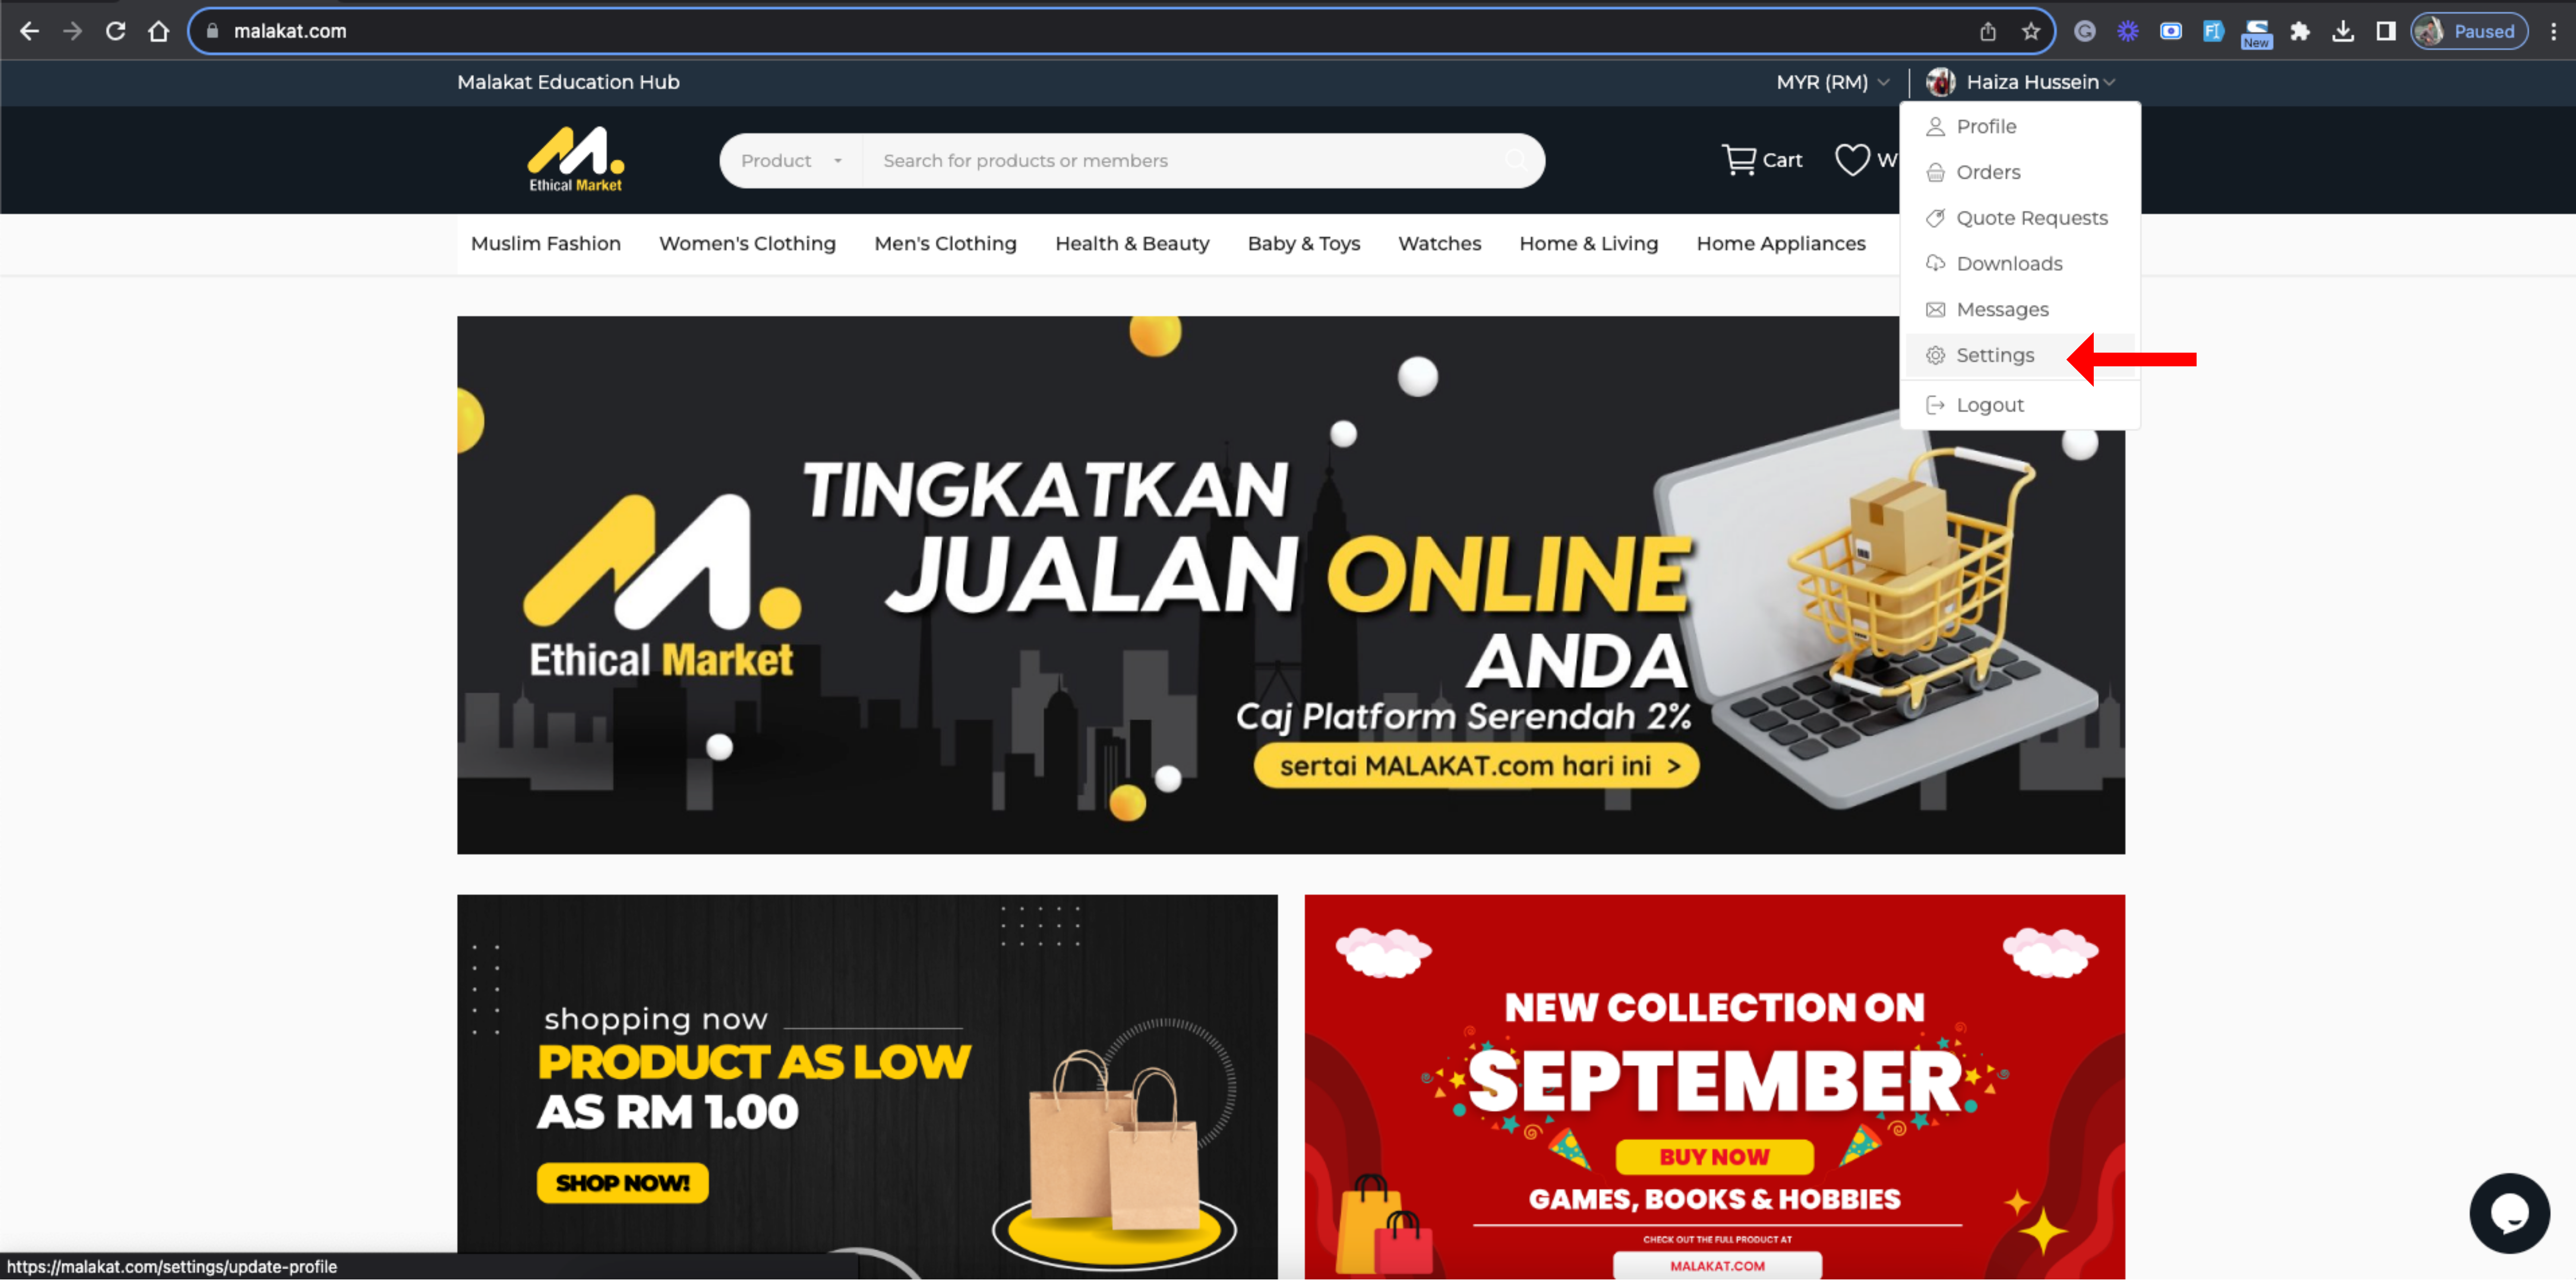
1. On your Dashboard, click on your username
2. On the dropdown menu, click “Orders“
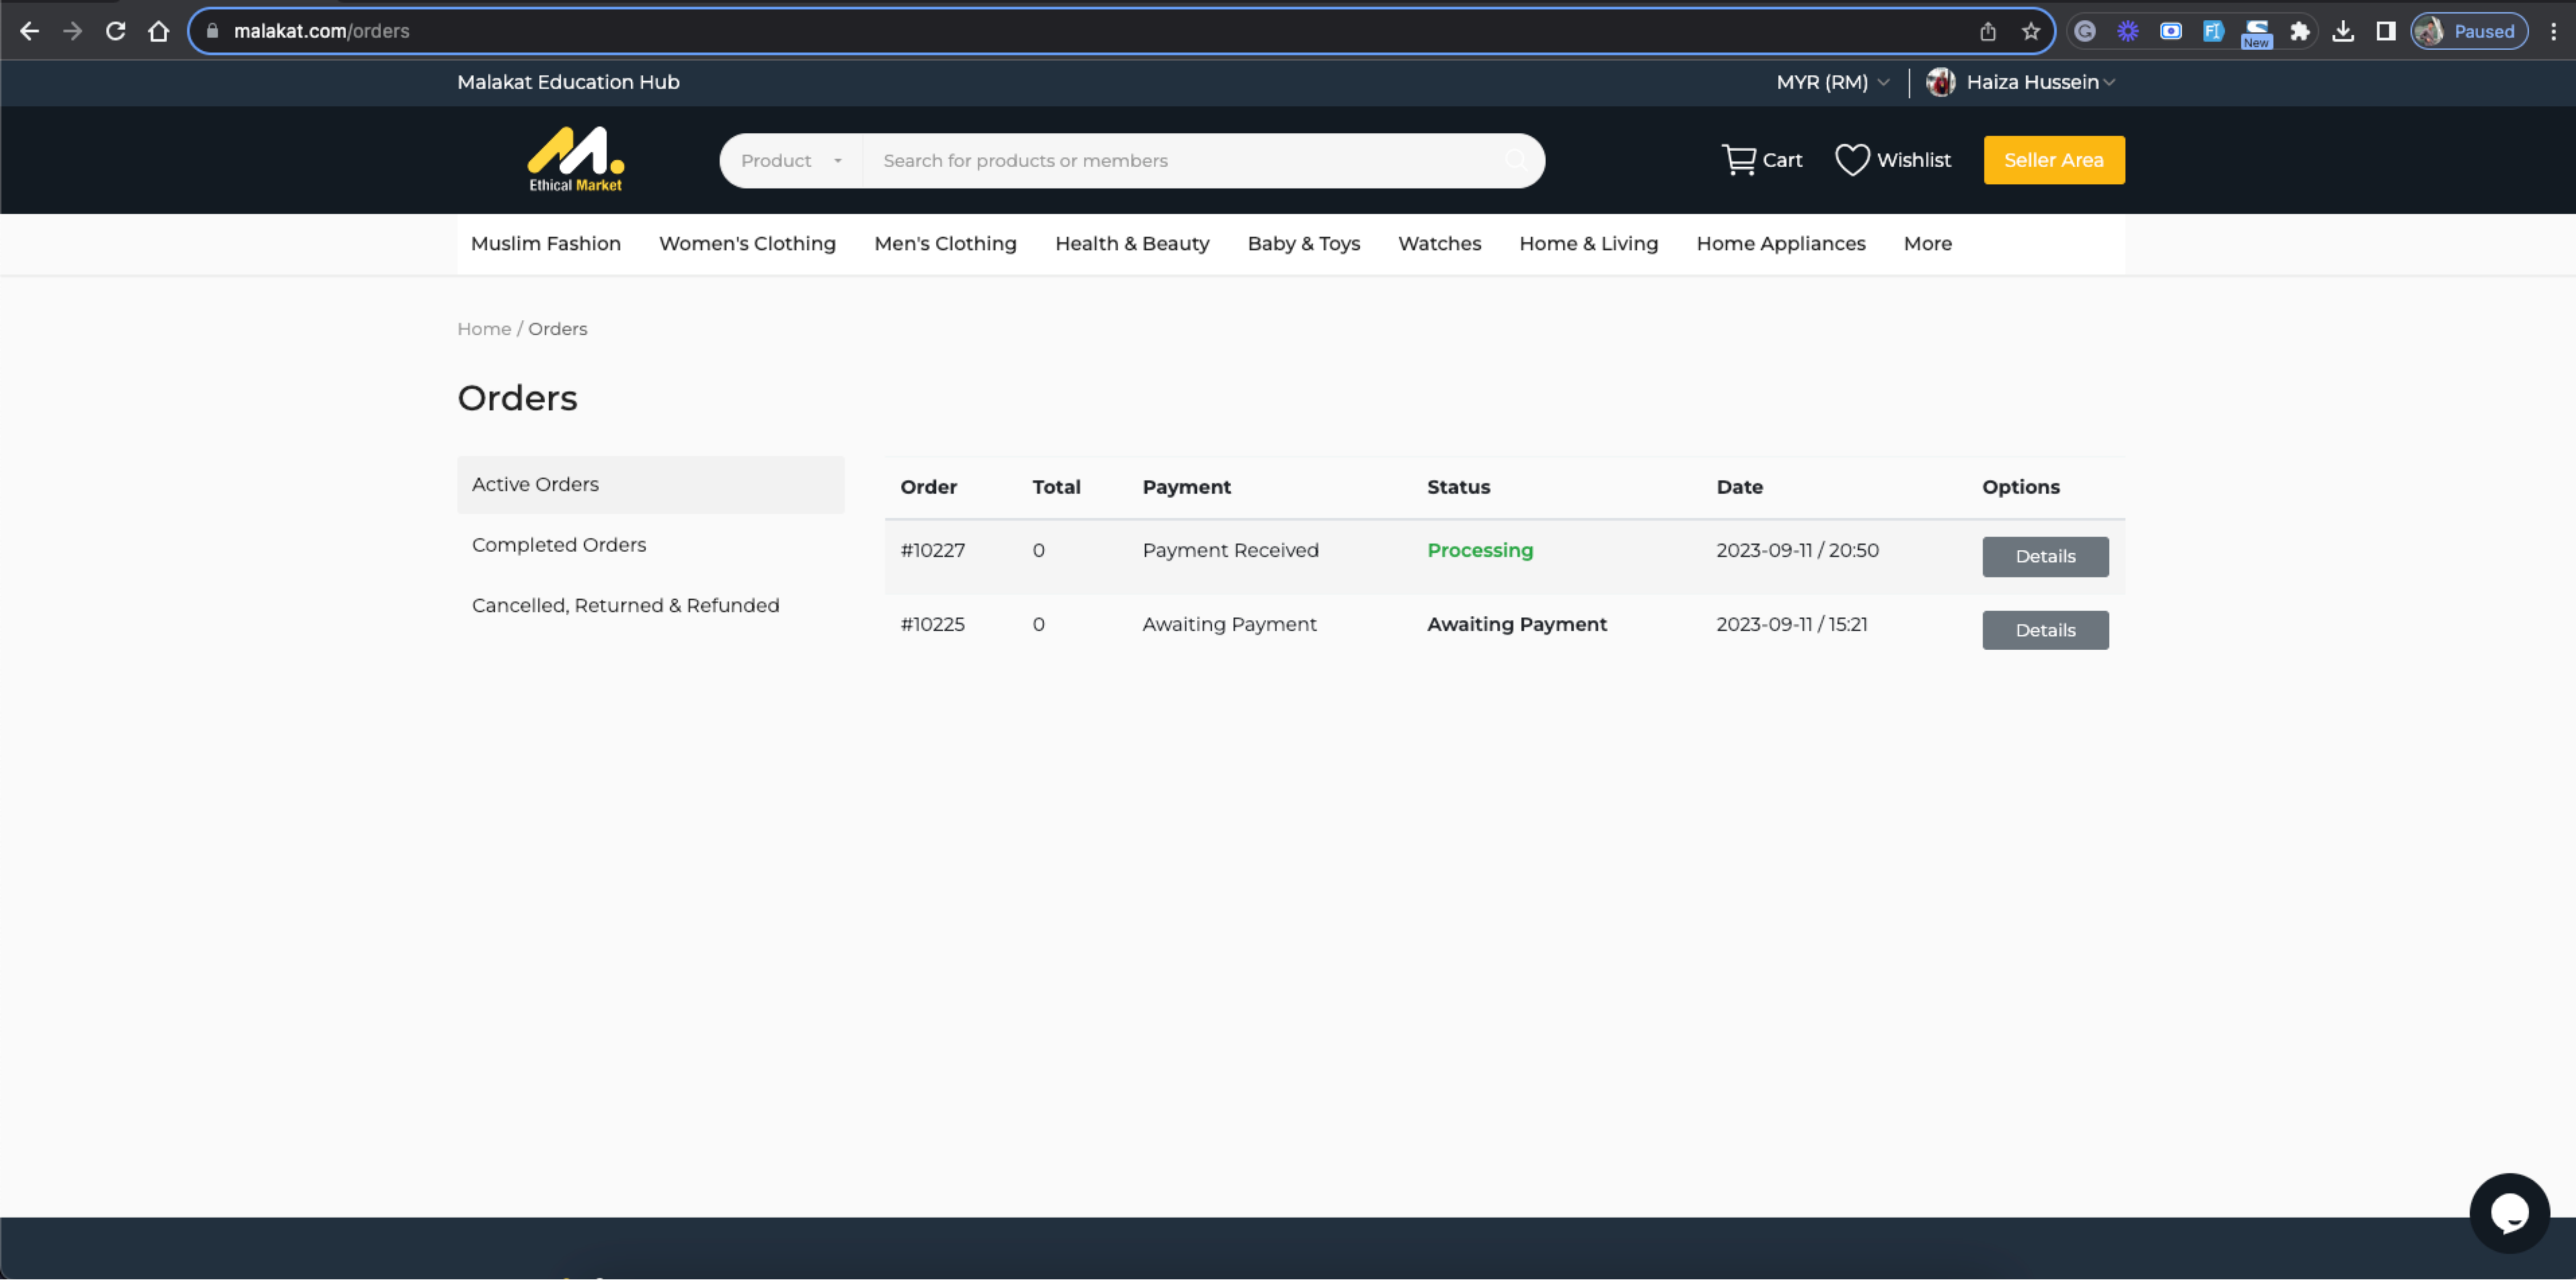
3. On the “Orders” page, the user can view all Active Orders, Completed Orders, Cancelled, Returned & Refunded Orders.
2. On the dropdown menu, click “Settings“
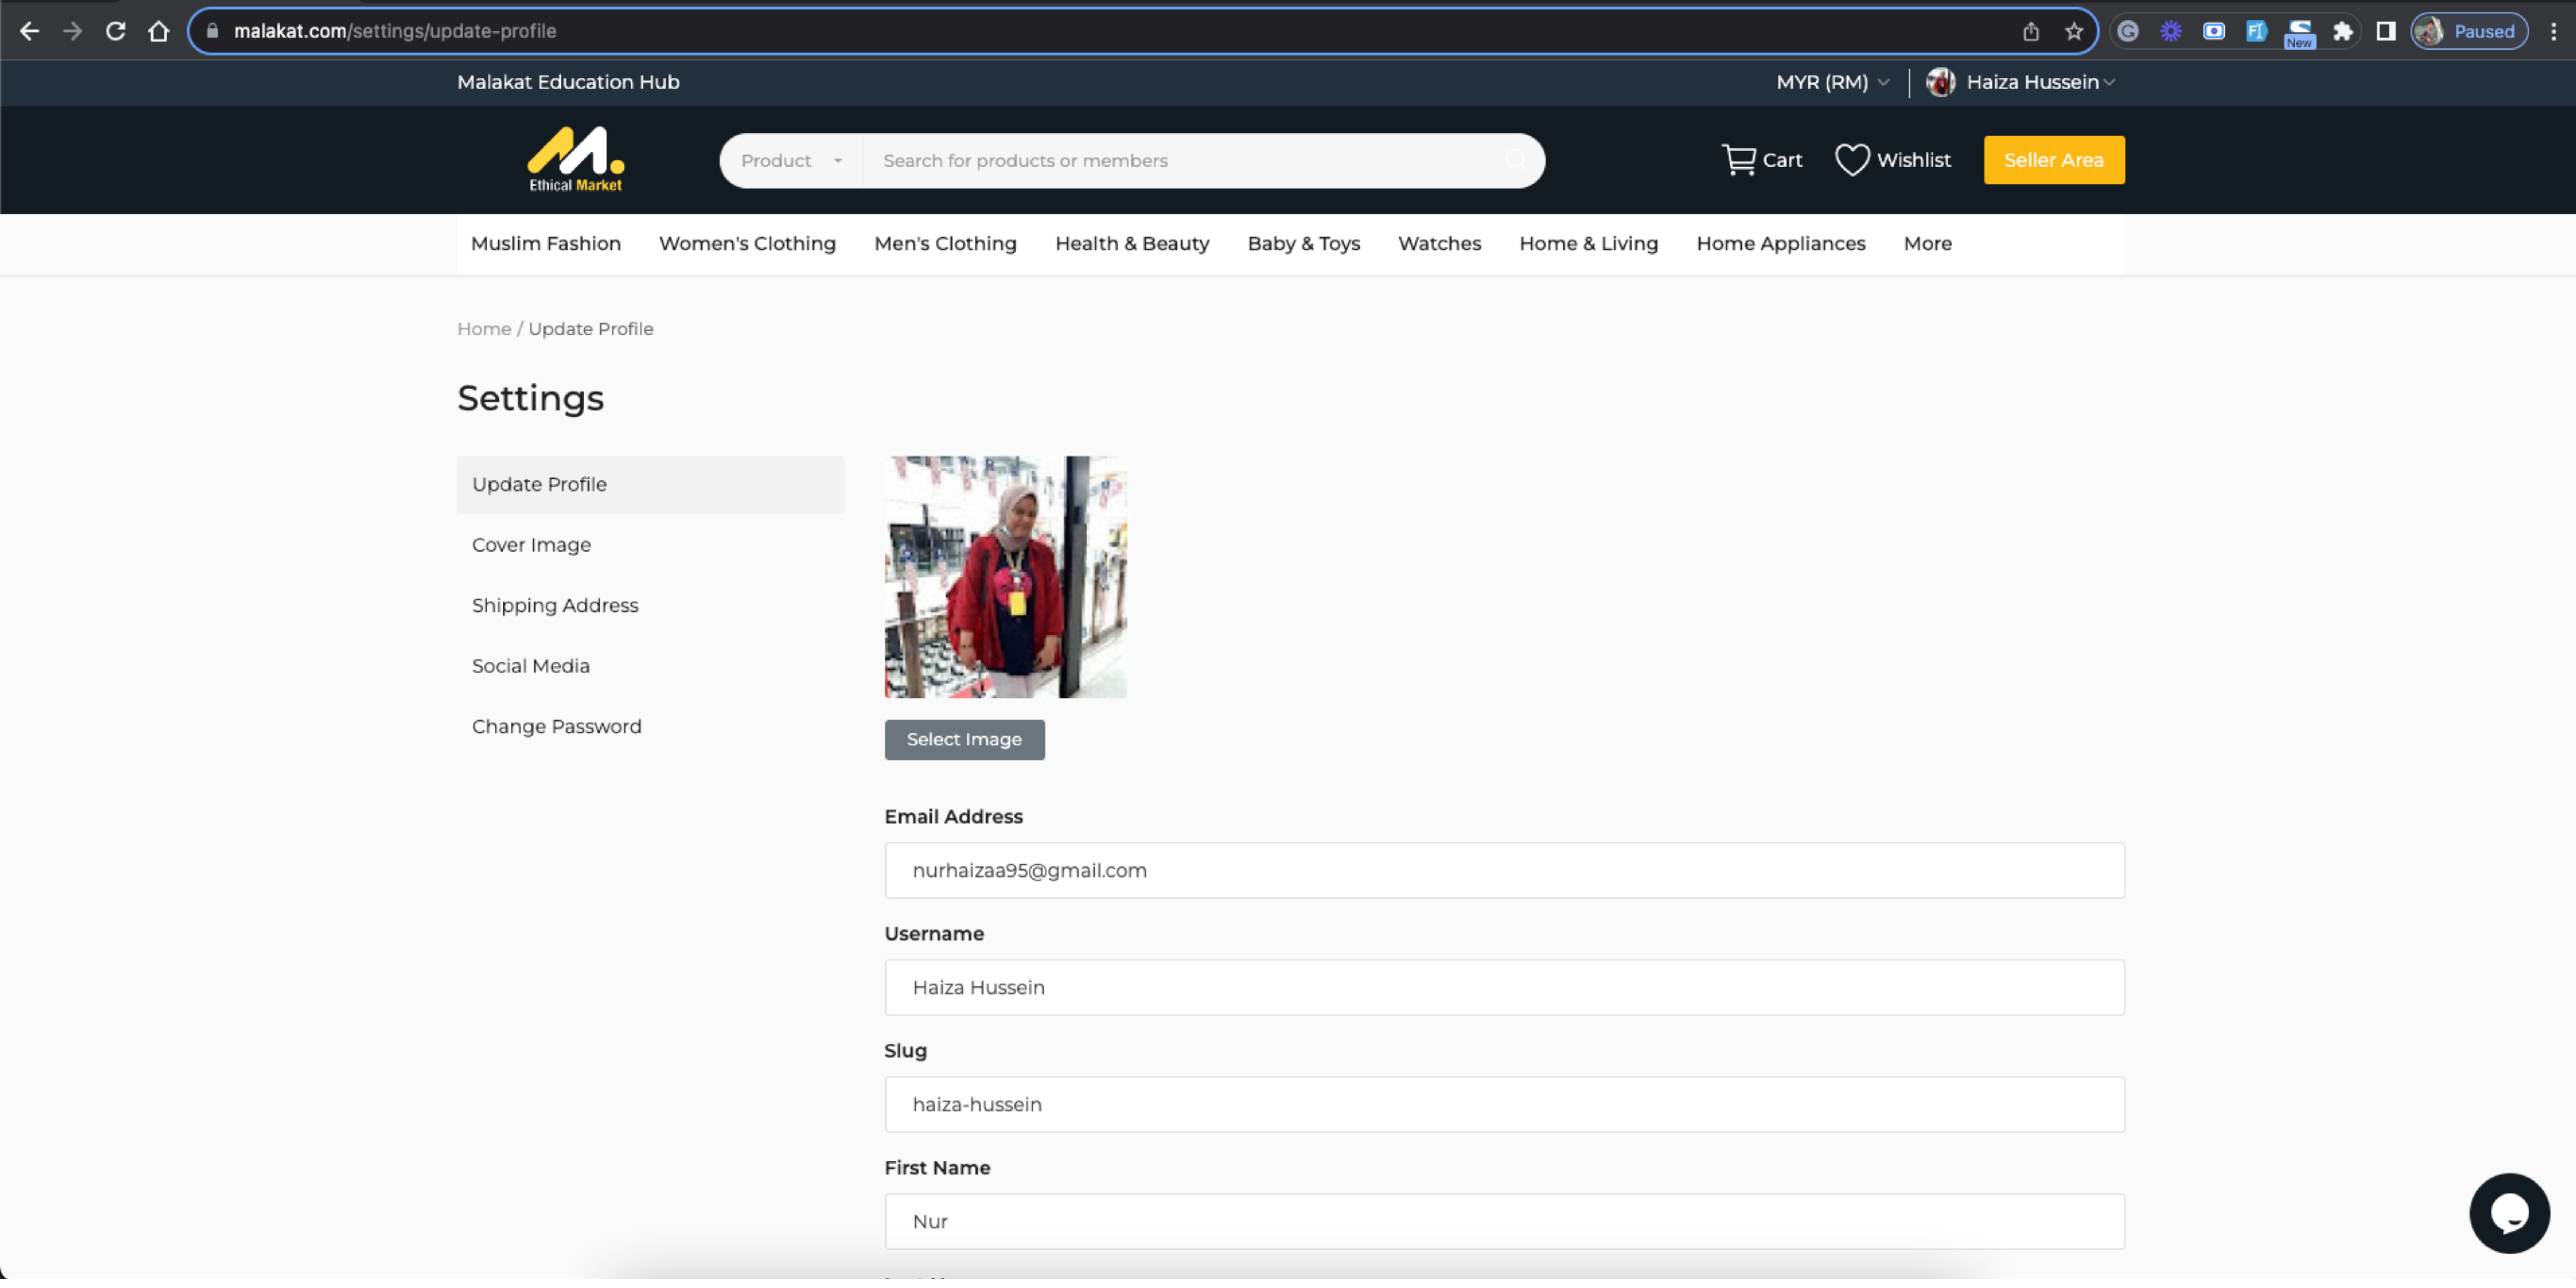
3. On the Settings page, user can update their profile, change their shipping address, and reset their password.
© MALAKAT 2021 . ALL RIGHT RESERVED.